Showing posts with label Kitchen Tip Tuesday. Show all posts

Tuesday, July 10, 2012

How To Tell When Beans Are Cooked

We eat beans and rice frequently around here.  They are cheap, filling, and a meal we really enjoy.  I cook beans from dry in my crockpot, and usually tend to overcook them.  The other day a friend told me a tip for how to tell when they are done cooking.


Take a spoonful of beans out of the pot and blow on them.  If the skins wrinkle and start to peel, they are done.  Magic!  I've used this tip successfully for a while now, each time thinking: "Why didn't I know this earlier?"  So there, now you know.  Or was I the only one who didn't know this handy tip?

See Tammy's Recipes for more Kitchen Tip Tuesdays.

Tuesday, June 26, 2012

Kitchen Tip Tuesday: Gluten Free Baking Tips

I'm still getting used to gluten-free baking.  After pulling my one million flours out of the freezer, it takes quite some time to measure them all out.  Gluten-free chocolate chip cookies are amazing though and totally worth it!


To minimize the mess and save time, if I know we like a certain recipe, I mix two batches of the flours at once.  In the photo above, I have one batch of chocolate chip cookies started in the bowl and another in the container with the blue lid.  I store the extra mixes in the refrigerator.  Having the dry ingredients ready to go makes baking much easier the next time.

Another time saver is to freeze some of the cookie dough in little scoops all ready to bake.  My only problem with this is that we eat them straight out of the freezer before I can bake them!  I also keep gluten-free bread in the freezer and just toast a few pieces at a time as we need them.

Thanks to The Healthy Gluten-Free Life for the above tips, and for the amazing chocolate chip cookie recipe!  Do you have any gluten-free baking tips to share?  Linked to Kitchen Tip Tuesday.

Tuesday, June 12, 2012

Kitchen Tip Tuesday: Storing Gluten Free Flours

If you've ever baked gluten-free, you know that it requires exactly one million different flours.  It took me a while to figure out how to store them all.  Here is my current system:


Many flours keep best in the freezer or refrigerator.  I use a basket to hold some of the bags.  Each bag has a binder clip on it to keep it shut.  When I want to bake, I pull the whole basket out of the freezer, along with anything else I need.

Some of the flours I buy whole grain and grind with my Vitamix.  Those are stored in lock n lock containers and labeled.  The whole top shelf of my freezer is flours and grains.  The little box in the front is ground flax, behind it is cornmeal and amaranth flour.  A few of the flours are in the refrigerator because the freezer was full.  (The bottom shelf is leftovers packed up for Ross' lunch, and fruit for smoothies.)  Sorghum flour and xanthan gum are in the cupboard.


How do you store gluten free flours?
See Tammy's Recipes for more Kitchen Tip Tuesdays.

Tuesday, June 5, 2012

Kitchen Tip Tuesday: Spaghetti

Spaghetti is one of our favorite easy meals.


My only problem is that the ratio is never right for leftovers; we always end up with more sauce than noodles or vice versa.  My trick lately is just to mix it all in a big bowl before serving it up.  Everyone gets just the right amount of sauce, and leftovers work perfectly too!  Don't ask me why it took me a couple years to figure this out...

See here for more Kitchen Tip Tuesday posts.  :)

Tuesday, December 27, 2011

Christmas Cookie Tips and a Recipe

My best tip for baking roll out Christmas cookies?  Invite someone over to help!  Last year we made our cookies at a playdate.  This year Grandma and Grandpa came over to help with the long process of rolling, cutting, and baking join in the fun.


The girls loved rolling out the dough and using cookie cutters.  Esther put each cookie in her hand and had to show it to everyone before putting it on the tray.  They all worked very hard and are so proud of their creations.


Tip #2: We will probably frost a few of them just for fun, but we enjoy eating these unfrosted for the most part.  They store well in the freezer that way and we just grab a few out at a time to eat.

Tip #3: If you enjoy soft chewy cookies, roll the dough a bit thick and use large cookie cutters.  It helps the process go faster that way as well.  ;)

Tip #4: Give some away!  We sent a bag full of cookies home with Grandpa and Grandma and still have plenty left over to enjoy.


Tip #5: Use soft white wheat flour to make these whole wheat, yet still light and tasty:

Roll Out Sugar Cookies

1 1/3 cup butter
2 cups sugar
Cream together.

2 eggs
1 tsp vanilla
4 Tbs milk
4 cups flour
1 tsp baking powder
1 tsp baking soda
1 tsp salt
Beat in ingredients.  Chill overnight, roll, cut, and bake at 325 for 8-10 minutes.

linked to Kitchen Tip Tuesdays

Monday, November 21, 2011

My Recipe Book

My recipe book has evolved over the years.  It started out as a box.  There were index cards crammed in there of all shapes and sizes.  Cards that people gave me and recipes I wanted to try, along with of course our family favorites.  Meal planning was difficult: picture dozens of cards scattered all over my table.  Then there were all of the recipes I was printing off the internet that just weren't index card size.

I moved up to a three ring binder and page protectors.  With different categories (breads, dinners, soups, etc), I would slip recipes in the page protectors under the correct section.  That too soon became overcrowded, so I set out to get things under control.

One weekend I typed all of my recipes into the computer.  I selected only recipes that we had tried and I knew my family enjoyed.  I typed each recipe in the same format, in a way that is easy for me to read and follow as I am cooking.  (Like this recipe where I list ingredients and instructions for those ingredients, and under that more ingredients and instructions for those, instead of all the ingredients at the top.)  I got the idea from the book Simply In Season, and love having my recipes typed that way.


I still have categories (breads, breakfasts, side dishes, soups and sandwiches, dinners, and desserts).  Recipes that I want to try go in a pocket in the front.  If we try them and like them, I type them into the recipe book and print out that page to add.  Sometimes I will try recipes a couple times or tweak them a bit before I type them in.  I've also gone through and purged my book of "junky recipes" a couple times.  The recipes in my book are healthy foods that I feel good about serving my family.  

I love having my recipes all neatly typed up!  My book is simple to use.  Meal planning is much easier when I can flip through our tried and true favorites and then select one or two new recipes from the front pocket.  Having everything on the computer allows me to easily print off a recipe for a friend or email it.  I also plan to print off copies of our family recipe book for all of my children when they are old enough.  Its fun to add to my book and watch it grow - that finally perfected salsa recipe, the whole wheat crackers that turned out well, and so on.

What does your recipe book look like?  Does it need an overhaul?


linked to Kitchen Tip Tuesday

Tuesday, October 18, 2011

Kitchen Tip Tuesday: Homemade Cream Cheese (sort of)

My kids enjoy bagels and cream cheese for breakfast, but the flavored cream cheese at the grocery store is full of all kinds of additives.  We've started buying plain whipped cream cheese and adding our own flavors:


Sometimes I mix strawberry jam in with the cream cheese.  Of course though the kids' favorite is when I spread the plain cream cheese on a bagel and sprinkle brown sugar over top.  Not quite as healthy, but still free of colors and preservatives.  :)  What other flavor combinations should we try?

linked to Kitchen Tip Tuesdays

Tuesday, September 6, 2011

Sneaky Carrots

One of my children in particular is a very picky eater.  It is nearly impossible to get her to eat any veggies... except when she doesn't know she is eating them.  ;)


Whenever we have macaroni and cheese for lunch, I add two cubes of pureed carrots and no one can taste the difference.  To make the cubes:

- Peel, chop, and steam a big bag of carrots.
- Puree them in a blender with a bit of water.
- Freeze in ice cube trays and store in a plastic bag in the freezer.

Add to cooked drained macaroni along with the butter, milk and cheese as usual.  The hot noodles melt the cubes fairly quickly, and I think the carrots even make the macaroni taste creamier.  You can also add the carrot cubes to spaghetti sauce and whatever else you can think of.

Do you have any tricks that you use on a picky eater?  

linked to Kitchen Tip Tuesdays

Tuesday, May 3, 2011

Baked Brown Rice


I have failed at cooking rice sooo many times.  My rice always turned out sticky, not to mention sticking like crazy to the bottom of the pot.  I tried using a rice cooker for awhile, but it had a non-stick coating inside (ie toxic chemicals), and was big and bulky to store.  When we switched to eating brown rice instead of white rice, that presented even more challenges.  I'm happy to say that I have finally found an easy way to cook rice!  I've been using this recipe for months now and it always turns out great.

Baked Brown Rice

1 1/12 cups brown rice
2 1/2 cups water - heat to boiling in a teapot
1 Tbs butter
1 tsp salt

Preheat oven to 375.  In 8x8 casserole dish, add rice, salt, butter, and boiling water.  Stir to dissolve butter and salt.  Cover tightly with foil and bake for 1 hour.  Fluff with a fork and serve.  (recipe from Alton Brown)  :)

Check out more Kitchen Tip Tuesdays here.

Tuesday, November 9, 2010

Kitchen Tip Tuesday

This is seriously the best. tip. ever.  I love baking (and eating!) muffins.  What I don't like, is touching the batter and getting all messy trying to fill the tin evenly.  I cannot even begin to tell you how happy I was when someone told me that you can use a cookie scoop to fill a muffin tin.  Genius.  Okay, so maybe the rest of you already knew this, but in case you didn't, your life is now infinitely better.


A regular size cookie scoop is 2 Tbs, and it takes about a scoop and a half to fill each space.  I love this tip so much that I just bought this large cookie scoop (3 Tbs) to make it even better.  One scoop is perfect for each muffin.  They should just call it a muffin scoop.  Just look at this nicely cleaned out bowl - all I did was use my large scoop 12 times.  Mmmm...  I might have to go bake muffins now.
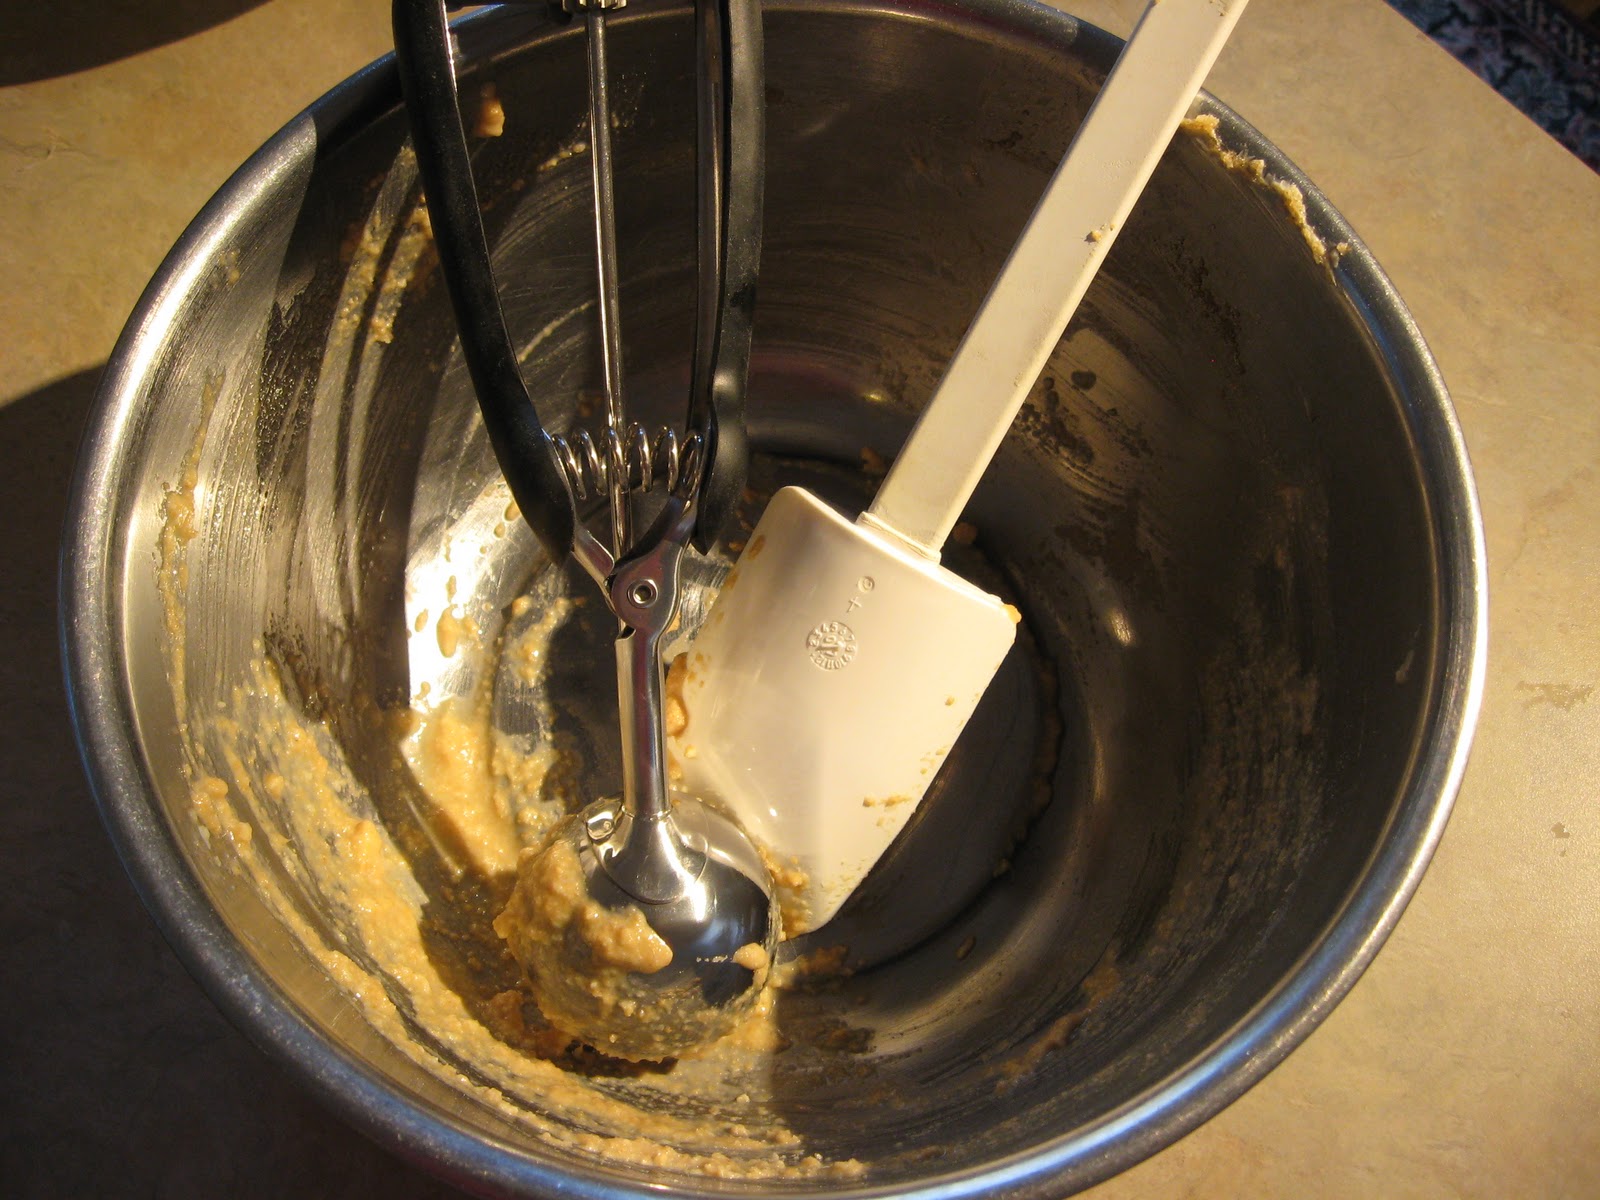

Check out Kitchen Tip Tuesdays for more great tips.  :)

Tuesday, October 26, 2010

Easy Reusable Swiffer Cloths

Did you know that you can use a microfiber towel as a Swiffer cover?  It works really well and is very easy to do.  Microfiber towels can be found in the auto section of your local store and cost about $1 each.  They make great dusting cloths too.

Fold the cloth in half:


Tuck the cloth into each of the four slots on the Swiffer:


Get to work Swiffering!  

OR

Remove two pieces of the handle to make the Swiffer just the right size for kids.  (If you have never used one before, the handle extensions easily snap on and off so this is very simple to do.)  My girls both love Swiffering for me.


Much of our house is wood flooring, ... and we have a dog, ... and I don't clean enough ... as you can clearly see...


Shake the dust into the trash can and toss your Swiffer cloth into the wash.  If you have more cleaning to do, simply fold the cloth dusty side in and reattach it.

I'm going to try and follow these instructions (or these) to make a cover for our little hand held Swiffer duster.  Do you think I could get away with giving my girls each a Swiffer duster for Christmas?  Maybe if I made the covers hot pink?  Hmm....

Linked to Kitchen Tip Tuesdays.

Tuesday, August 3, 2010

Kitchen Tip Tuesdays - Baked Potatoes

Yesterday I shared our super fun dinner of Baked Mr Potato Heads.  :)  I promised to share my secret tip for the easiest, tastiest baked potatoes ever....

bake them in the crockpot.

Thats it.  Pile your crockpot full of washed clean potatoes and bake on high for 4 hours, or low for 8 hours.  The potatoes turn out very tender and moist.  This saves energy because you don't have to turn on the oven.  It also cuts down on waste since you don't have to wrap the potatoes in foil.  I have been trying to stay away from foil when possible because of the aluminum exposure.  These turned out wonderfully, I'll definitely be using this method again.

You can use your extra potatoes to make Laura's Hashbrowns.  Yum!

linked to Kitchen Tip Tuesdays

Find more healthy recipes here: Heavenly Homemakers Recipe Parade

Tuesday, June 22, 2010

Living Without the Microwave


Its been one month since I banished our microwave to the basement and decided not to use it any more.  There were a few moments when I actually said out loud "Why on earth did I do this to myself?".  In reality though it only took a bit of extra thought to figure out how to heat things up.  My husband thought I was a little crazy, but he has gone along with it and hasn't complained.  I asked him last night if he missed the microwave and he said that he did not.  I honestly do not miss it either and I'm rather surprised about that!

My tea kettle, toaster oven, and skillet have served me well.  We eat a lot of leftovers, but heating them has not been as hard as I thought it might be.  Here is some of what we do:

casseroles - warm in the toaster oven in a small dish (this can take a while, so plan ahead)

leftover Chinese food - heat in a skillet on the stove with a bit of extra water or oil (doesn't take long at all)

leftover spaghetti - mix sauce and noodles and bake in toaster oven

leftover noodles (the girls like noodles with butter and parmesan cheese) - boil water, dip noodles in the water for just a minute or two and then pull them out

soup - warm in a pan on the stove

heating water - use the tea kettle

leftover fajitas - heat chicken mixture in a skillet; to warm the tortilla put it over top of the pan while the mixture heats up

I have been surprised at how quickly the food heats up.  It tastes better, like real food instead of rubbery and its evenly heated.  The extra counter space is nice too.  I've had space to keep my grain mill out and have used it to try a few new things that I'll share with you soon.  Sadly though, my counter doesn't look as clean as in that photo anymore.

linked to Kichen Tip Tuesday

Tuesday, March 9, 2010

Clumpy Brown Sugar


The other day I needed brown sugar for baking and realized that mine was all clumpy and hard. It was so hard I couldn't even break the clumps with a fork. Shaking the container as hard as I could did nothing except scratch up the plastic! I thought I was going to have to throw it all away but decided to look up remedies online first.

One trick that sort of worked was to put some of the brown sugar in the microwave with a cup of water and heat it for several minutes. It was still pretty hard after that and I had to break up each clump with a fork. Enough sugar came loose to bake my cookies and then I decided to try another trick I had read. I just put a piece of bread in the container and closed it up.

About a day and a half later I opened the sugar and was amazed! It was the softest fluffiest brown sugar I had ever felt. The clumps didn't even have to be broken up, they just fell apart. Of course my next thought was... Kitchen Tip Tuesday! I also bought a brown sugar bear so that I don't have clumpy sugar ever again. I haven't used it yet so maybe that will be another post some day.

For more kitchen tips, check out Kitchen Tip Tuesday at Tammy's Recipes. If you haven't already, mark your calendars for Bake and Take Day! Thanks for stopping by.